Azure Blob Inventory Setup for Spotto Analysis
Overview
This guide explains how to prepare Azure Blob Inventory for Spotto and use it in two modes:
- Automatic mode (recommended): Spotto validates access and uses Azure-generated inventory reports automatically.
- Manual mode: you download the report from Azure and upload it to Spotto.
In both modes, Spotto analyzes inventory metadata (not blob content) to recommend storage tier optimizations.
The primary goal of this report is to identify meaningful storage cost savings opportunities.
Why Spotto Needs This Report
- Privacy & security: Spotto does not read blob content.
- Cost optimization: inventory metadata provides the fields needed for tier recommendations.
- Savings estimation: Spotto estimates impact using your real storage metadata.
Entry Point
- In the Spotto Portal, open Investigate -> Investigate -> Resources.
- Open your Azure Storage Account resource.
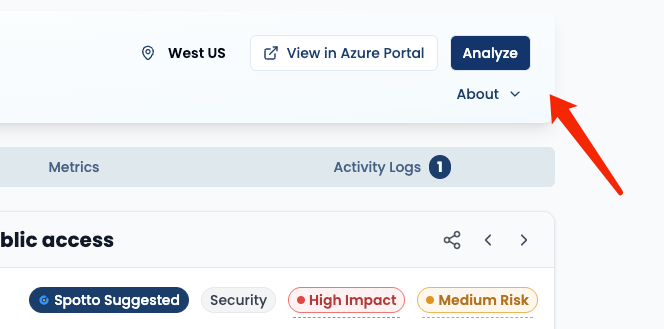
- Click Analyze to open Inventory Report Analysis.
Prerequisites
- Access to the target Azure Storage Account.
- Permission to configure Blob Inventory rule/settings.
- For Auto mode: Spotto service principal can be granted Storage Blob Data Reader on the storage account.
- For Auto mode: storage account can use Public network access = Enabled.
Setup Flow
Shared Azure Setup (Required for Auto + Manual)
Do these steps first for both modes.
Step 1: Navigate to Blob Inventory
- Open the Azure Portal.
- Open your target storage account.
- Go to Data management -> Blob inventory.
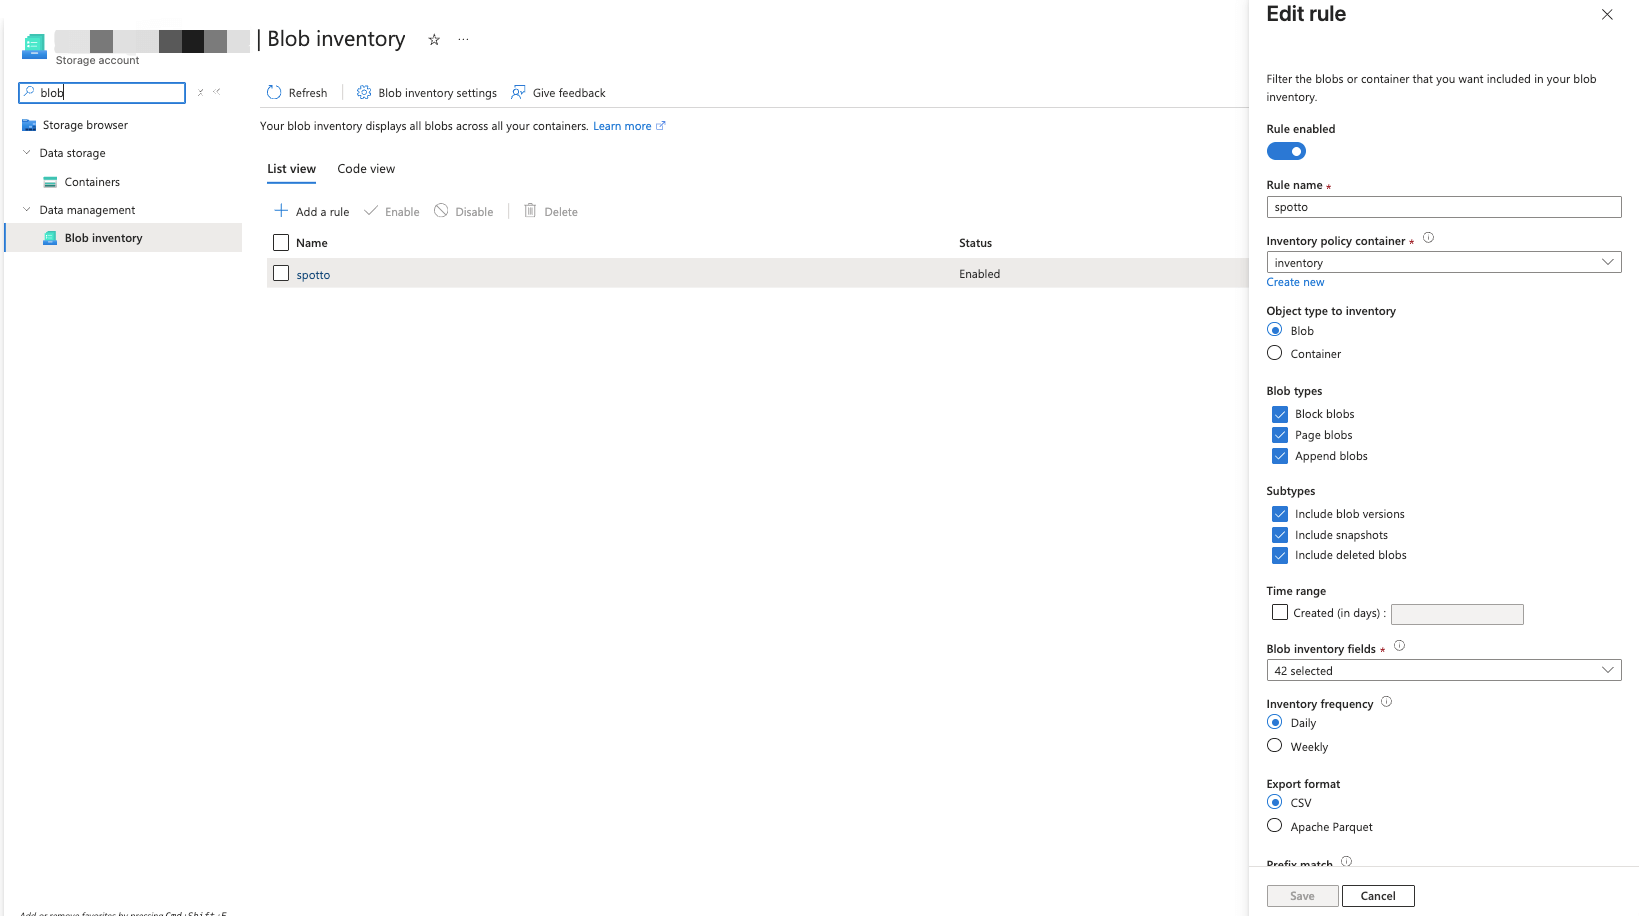
Step 2: Create Inventory Rule
- Click Add your first inventory rule (or Add rule).
- Use these settings:
- Object type: Blob
- Inventory frequency: Daily
- Export format: CSV
- Include schema fields required by Spotto analysis (for example: Name, Last modified, Last access time, Content length, Blob type, Access tier, Snapshot, Version ID, Deleted).
Step 3: Enable Last Access Time Tracking (Critical)
- Open Lifecycle management in the same storage account.
- Enable Access tracking.
- Allow time for tracking data to populate.
Step 4: Save and Wait
- Save the inventory rule.
- Wait for the first report (up to 24 hours).
Automatic Mode in Spotto (Recommended)
Automatic mode is enabled per storage account resource in Inventory Report Analysis.
Auto Requirements
- Grant Spotto Storage Blob Data Reader on this storage account (IAM).
- Ensure Public network access = Enabled.

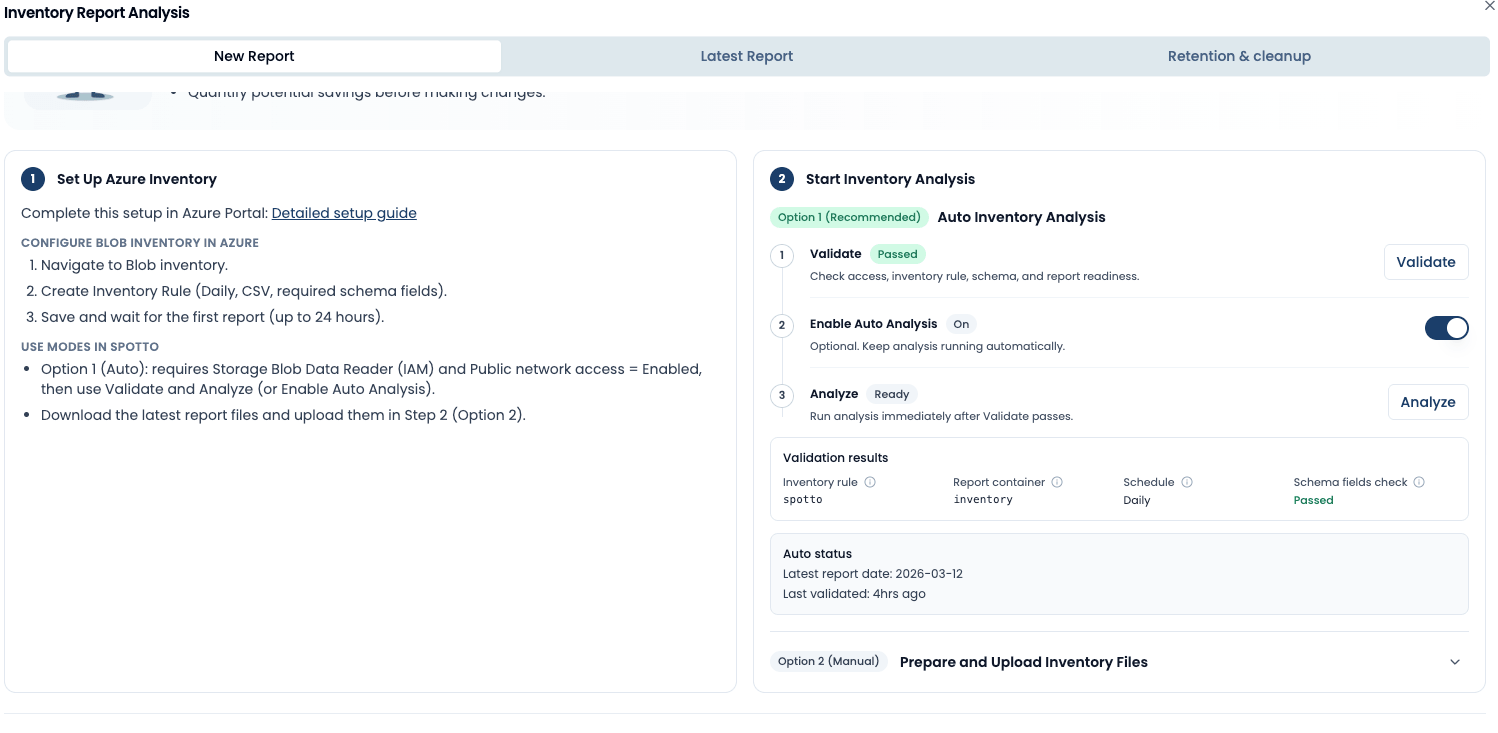
Validate and Enable Auto
- Open Inventory Report Analysis.
- In Step 2, click Validate.
- If validation passes, optionally enable Auto Analysis toggle for recurring runs.
Automatic Mode Status Signals
- Warning: still generating
- No report found for today/yesterday yet.
- Error: sync failed
- Spotto could not read the report with current access.
Disable Behavior
When you disable auto mode for a resource, Spotto stops automatic sync/analysis for that resource.
- Spotto does not delete Azure rule/container in reader-only mode.
- Azure continues generating reports until you change/remove the rule in Azure.
Public Network Access Requirement
For Auto mode, the target storage account must have Public network access = Enabled.
If it is private-only, use Manual mode upload.
Manual Mode in Spotto
Download Report Files
- In Azure Blob inventory, open the destination container used by your rule (for example
inventory). - Open the latest date folder, then open the rule-name folder.

- Select report files and download.
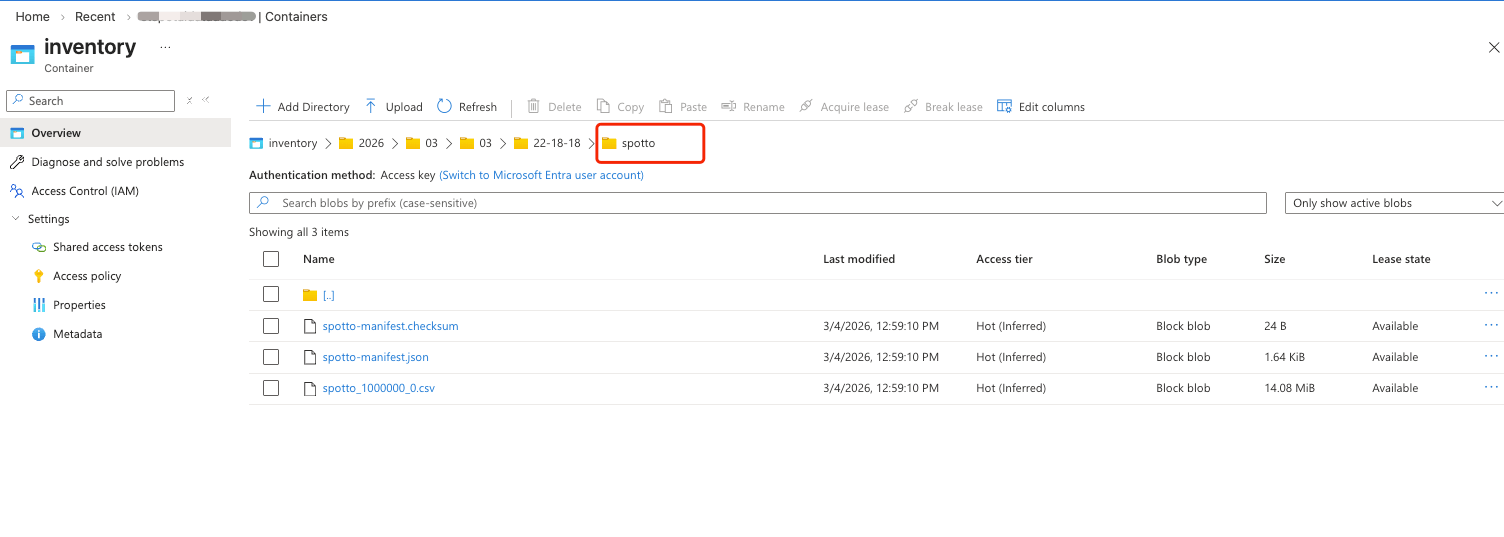
- Confirm package contents:
- one or more
*.csv - one
*-manifest.json - one
*-manifest.checksum
- one or more
Upload in Spotto
- Open Inventory Report Analysis.
- In Step 2, use Option 2 (Manual) and upload the ZIP.
Upload Checklist
- File type: Azure inventory ZIP package.
- Max file size: 1 GB.
- Keep files unchanged so manifest references still match.
View Report
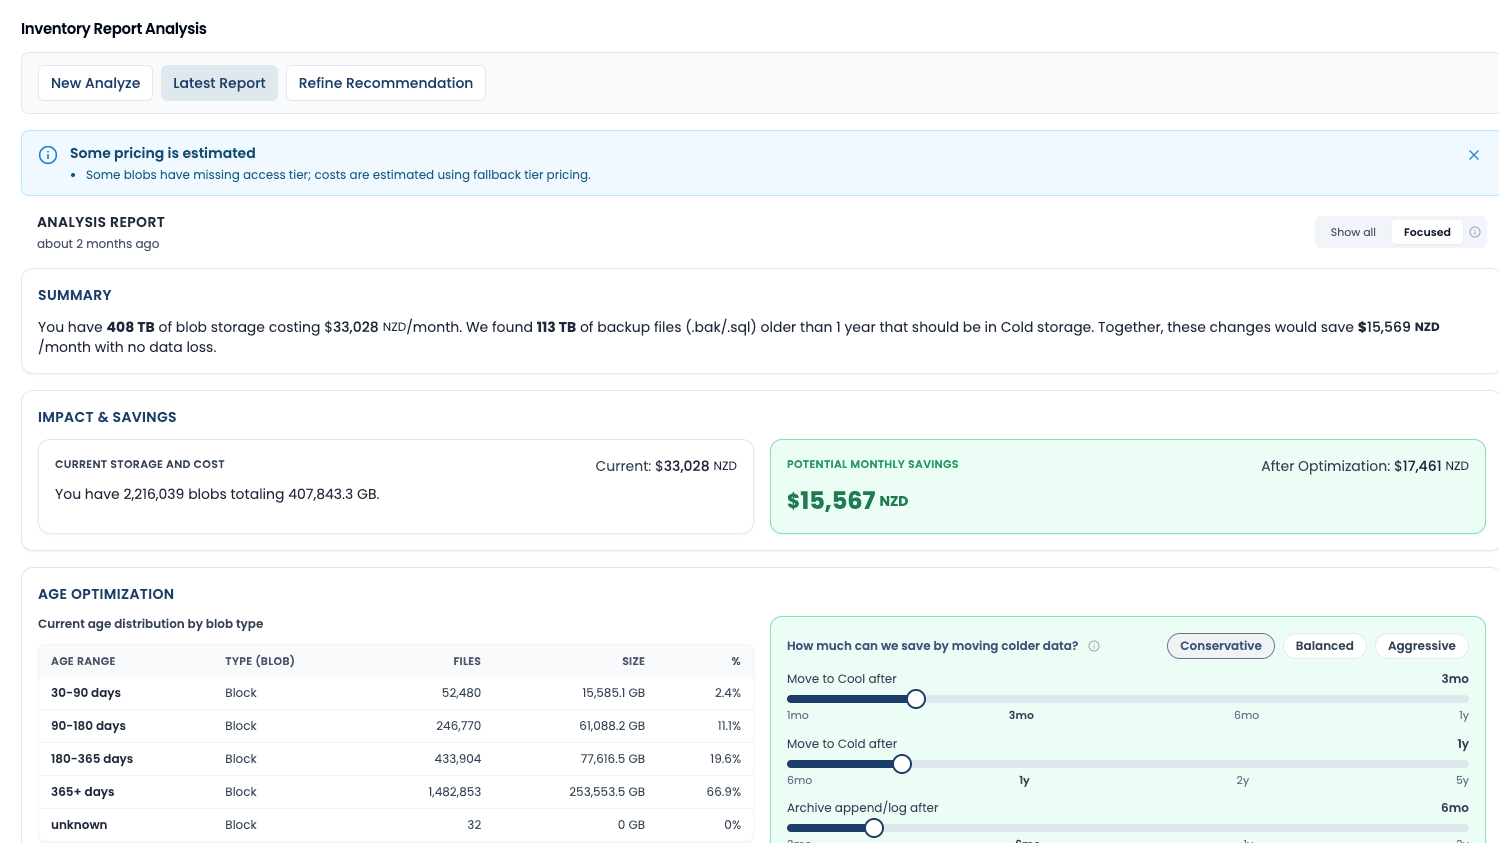
After analysis completes, open Latest Report in Inventory Report Analysis to review report date, blob count, size, and optimization summary.
Troubleshooting
Automatic mode shows "still generating"
- First report generation can take up to 24 hours.
- Keep the rule enabled and retry later.
Automatic mode sync failed
- Verify Storage Blob Data Reader assignment for Spotto.
- Verify Public network access is still enabled.
- Verify rule is enabled and writing reports.
Report not generating
- Verify rule is saved and destination container is valid.
- Verify Last Access Time Tracking is enabled.
Upload failed with "Request payload too large"
- ZIP exceeded 1 GB.
Upload accepted but analysis failed
- Manifest may be missing.
- CSV set may not match manifest references.
Azure Inventory Report Cost
Azure charges approximately US$0.006 per 10,000 files scanned.
- 1 million files: ~US$0.60
- 10 million files: ~US$6.00
Official pricing: Azure Blob Storage pricing.
What Spotto Will Provide
- Tier optimization strategy
- Estimated cost savings
- Lifecycle policy recommendations
- Risk checks for access pattern impact
- Implementation guidance
Support
If you hit issues, contact Spotto support with:
- screenshots of your setup
- approximate blob count
- error messages